Problem
Tektronix 465M oscilloscope trace is compressed to the right. Erratic/non-linear motion at slow speeds and the inability to position trace correctly with horizontal position controls.
Discussion
Purchased this cold-war-era military-grade oscilloscope from eBay to explore the world of electronics. It was sold as “working” but quickly exhibited the above problems. Didn’t expect to have to learn to fix the electronic device bought to help me learn to fix electronic devices, but with some time and effort, I was able to do it.
After, during or before your first foray into oscilloscopy (I think I made that word up), check out this handy instructional video for a brief history and introduction to the machine. Good stuff.
Solution
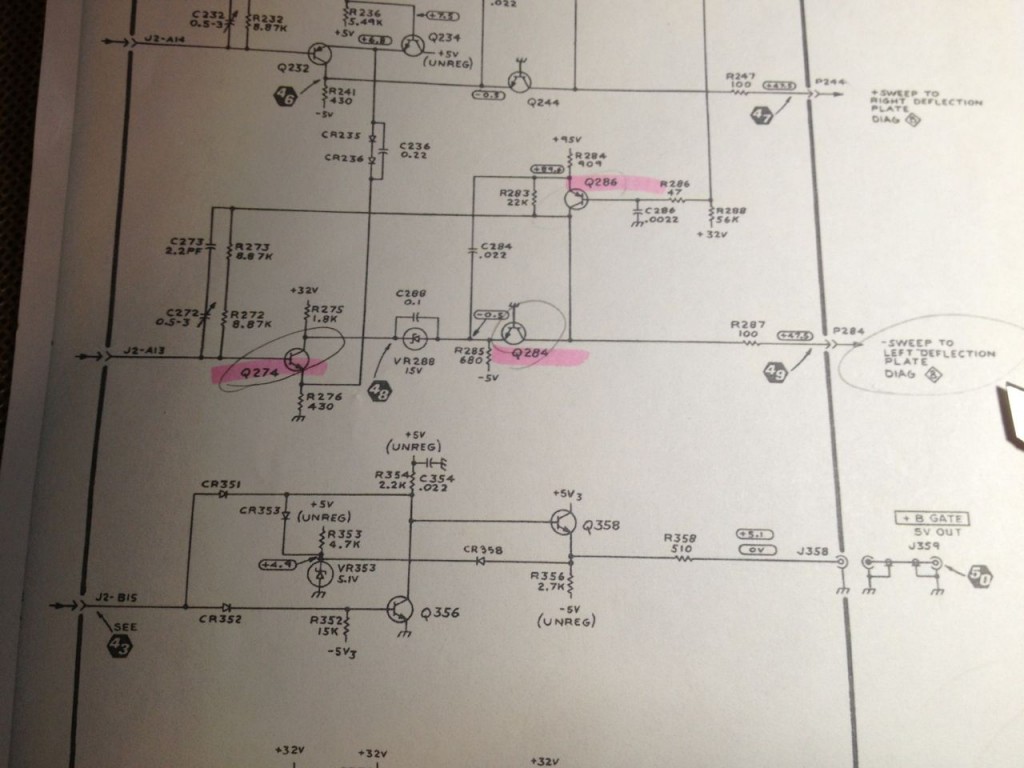
Analog oscilloscopes, it turns out, are complicated. First I had to read a book on general electronics repair, then the Air Force’s Tektronix 465M Service Manual. Those along with the Tektronix Concept Training for Service Technicians troubleshooting guide helped zero in on the problem. After hours with a digital multimeter and soldering iron, the culprit turned out to be a bad transistor in the horizontal output amplifier section on the main board, not the preamplifier or sweep generator boards in the horizontal section like I originally guessed.
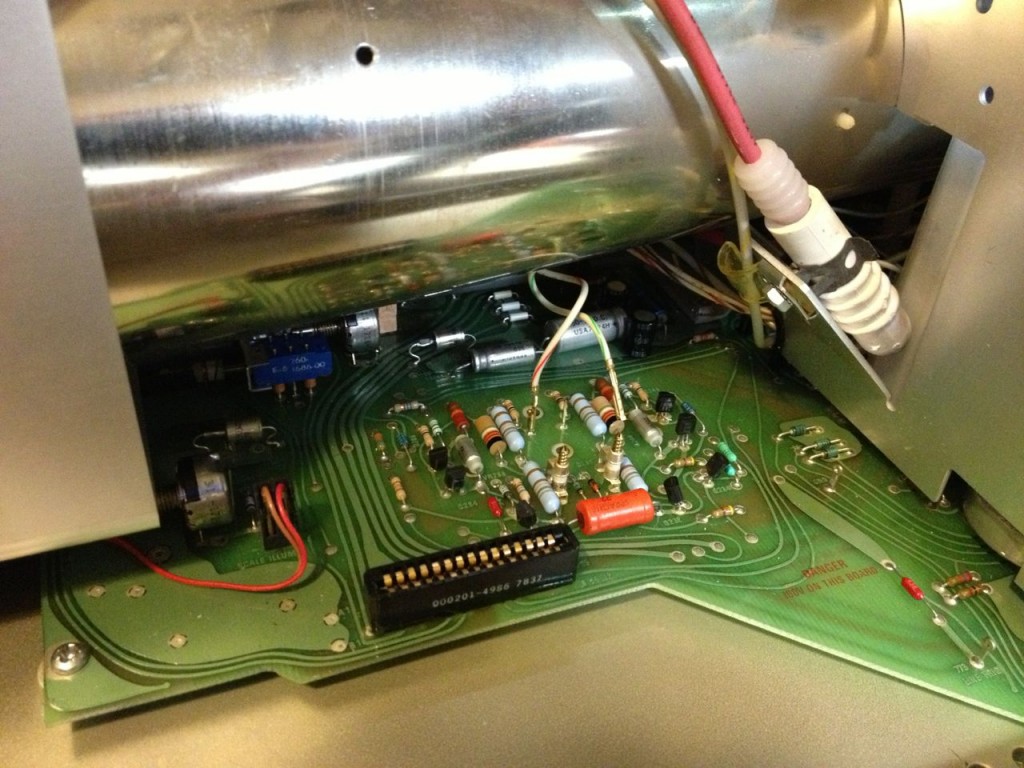
The 465M is impressively engineered and was a lot of fun to tear apart and discover the quality workmanship and attention to detail inside the case. The military documentation available for this scope is equally impressive and better than anything I’ve seen accompanying modern technology in the private sector. Here are the resources I used compiled handily in one place:
The Book I Read to Get Started
How to Diagnose and Fix Everything Electronic by Michael Geier. Highly recommended as a first step into the world of electronic repair.
The Service Manual(s)
There are several PDF versions of the U.S. Air Force’s Tektronix 465M Technical Manual floating around in bits and pieces. Here is the most complete 465M manual I found including clear schematics, excellent troubleshooting flowcharts and excruciating yet invaluable detail. There’s also a smaller version available on BAMA, but it’s missing some pages.
The Tektronix Concept Training for Service Technicians guide, functionally entitled Troubleshooting Your Oscilloscope, is very useful for coarse process of elimination and general troubleshooting. Check it out, but use the 465M-specific military manual as the authoritative source — it delivered the goods in this case.
This helpful parts site cross-references the military part numbers to typical component numbers you’re likely to find anywhere. I bought some specific transistors from Digikey, a useful transistor assortment from eBay, and a few parts from Fry’s.
Basic Troubleshooting Gear
Here’s a ridiculously good value auto-range digital multimeter for checking all those resistors, transistors and diodes. I was able to eliminate many possible points of failure this way.
My temperature controlled soldering iron did well on its second job. The first job was fixing a cold solder joint on a vintage Technics receiver, which led me to underestimate the likely complexity of future electronic repair endeavors. Several parts I removed from the 465M turned out to be good. I’ll chalk that up to the imprecision of inexperience and an effective process of elimination. A quality soldering iron allowed me to remove and replace parts without destroying anything in the process. The Geier book has a fine section on assembling an electronics workbench, and in this case the recommended basics were enough to repair the 465M.
A Tip I Wish I’d Found in the Manuals
The cables connecting the Vertical Module on the left of the unit to the cathode ray tube are difficult to see and moderately delicate. Be gentle with them. I inadvertently ripped them off at the CRT and had to carefully strip the wires and solder them back into place. Not fun.
JUST THE INFORMATION I WAS LOOKING FOR! My 465M horizontal is also acting up, mainly on the left side. Discovered the +98V rail is only at 68V with 14mV of ripple. Realized I’d have to disassemble the scope to get to the parts. Wasn’t sure if it was old elec. caps or a leady or shorted diode or transistor pulling the rail down. I do have the manual + schematics but not the Tek “Scope Troubleshooting’ reference you mentioned…until now! Thanks for posting that.
Look forward to soon having the 465M fully sweeping from left to right!